Converting a Shader from Three.js to Babylon.js
In Search of the Perfect Tree
There have been many, many attempts at creating a forest of performant trees in Babylon.js, to the point that there's a dedicated "Tree Generators" page in the official documentation.
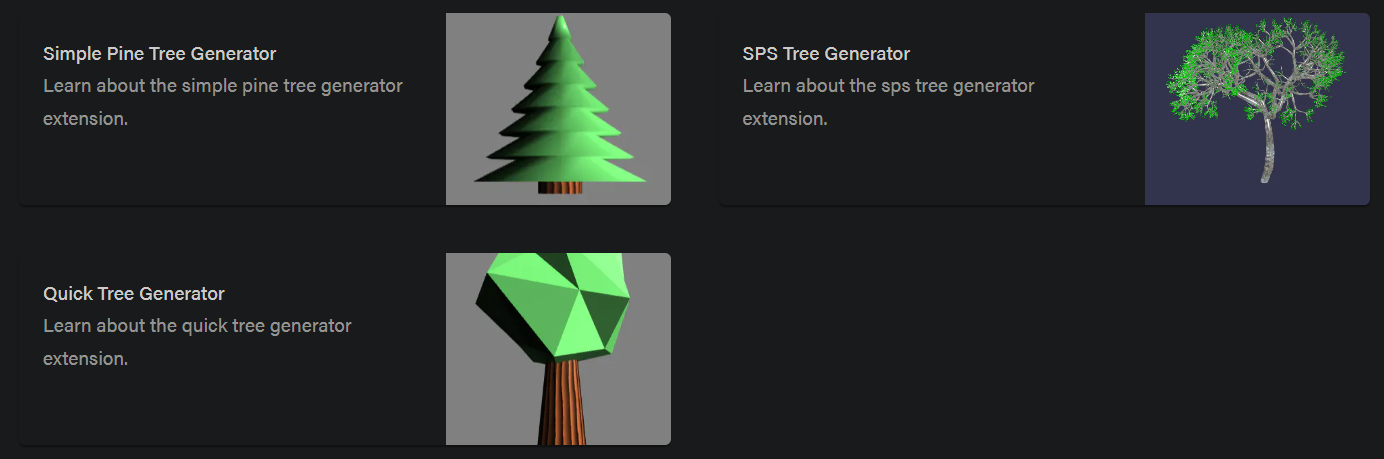
However, I was not impressed by the looks of the existing solutions, and went in search of a higher quality tree.
I came across this blog post titled "Creating fluffy trees with Three.js" and it instantly stood out visually. It used a custom GLSL shader applied to an extremely basic low-poly model of a tree, and the result was a beautiful, stylized, and performant tree.
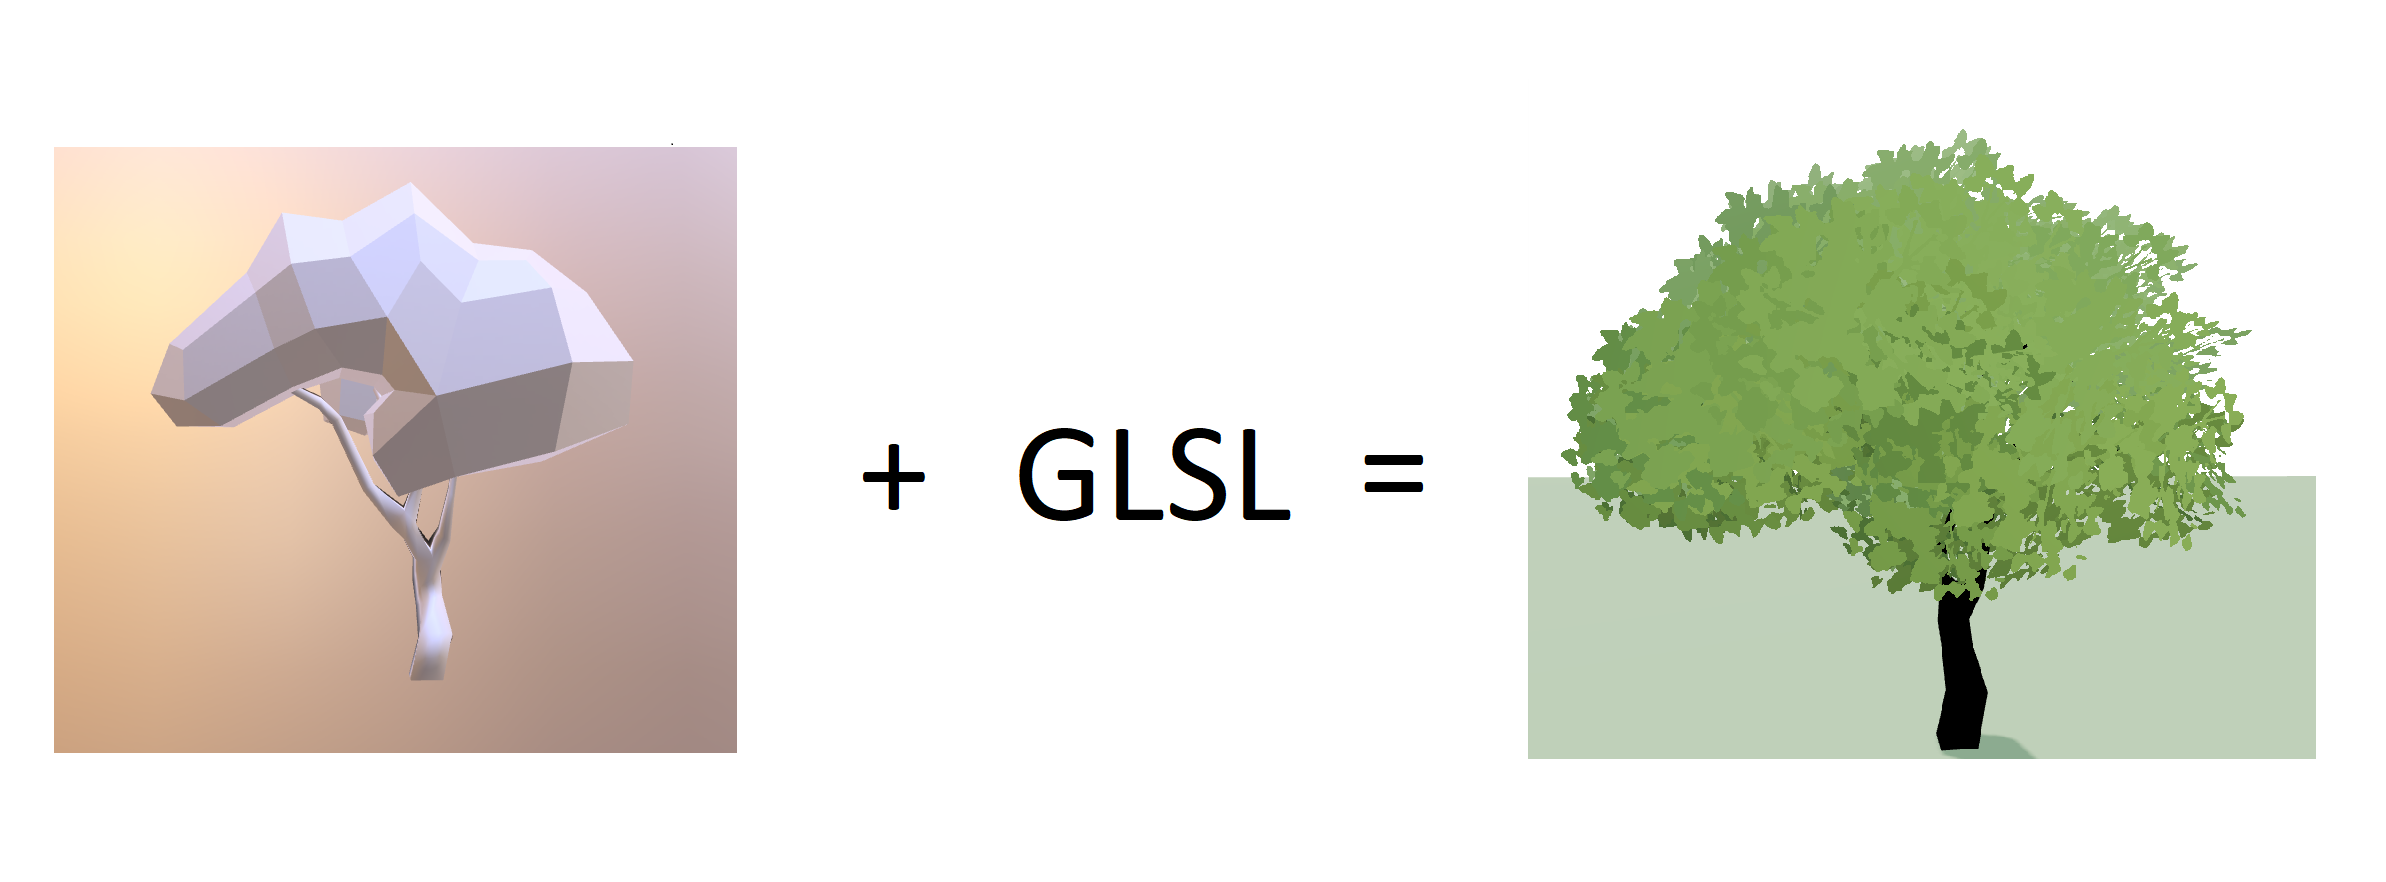
At this point I knew nothing about shaders, and assumed I could just copy over the shader code into BJS and it would work. This turned out to not quite be the case, so I'm going to walk through the steps I had to take to make the shader Babylon-compatible.
Using GLSL in Babylon.js
First I had to figure out how to use GLSL shaders in Babylon. The docs provide four ways of importing GLSL code into your project, and I found the easiest way to be to simply copy the code into a string and assign it to the BABYLON.Effect.ShadersStore, like this:
ShaderStore.ShadersStore['customVertexShader'] = `
    attribute vec3 position;
    attribute vec2 uv;
    attribute vec3 normal;

    #include<instancesDeclaration>
    uniform mat4 view;
    ...
    `;
Then to use that shader, you create a new ShaderMaterial, like so:
const shaderMaterial = new ShaderMaterial(
      'shader',
      scene,
      { vertex: 'custom', fragment: 'custom' },
      {
        attributes: ['position', 'uv', 'normal'],
        uniforms: ['view', 'projection', 'vLightPosition', 'u_color'],
        uniformBuffers: undefined,
        shaderLanguage: ShaderLanguage.GLSL,
      },
    );
I quickly realized I could not simply paste in the vertex.glsl file from the 3JS blog post though.
Converting the Vertex Shader for Babylon Use
Babylon has a Create Your Own Shader tool that helps identifying errors in your shader code, and I discovered that 3JS has different "uniforms" (variables passed from the application to the shader code) than those used by Babylon. Some of these are explicitly defined, others are built in.
Here's the entirety of the vertex shader I was trying to convert:
uniform float u_effectBlend;
uniform float u_remap;
uniform float u_normalize;

varying vec2 v_uvs;

float inverseLerp(float v, float minValue, float maxValue) {
  return (v - minValue) / (maxValue - minValue);
}

float remap(float v, float prevMin, float prevMax, float newMin, float newMax) {
  float t = inverseLerp(v, prevMin, prevMax);
  return mix(newMin, newMax, t);
}

void main() {
  v_uvs = uv;

  vec2 vertexOffset = vec2(
    remap(uv.x, 0.0, 1.0, -u_remap, 1.0),
    remap(uv.y, 0.0, 1.0, -u_remap, 1.0)
  );

  vertexOffset *= vec2(-1.0, 1.0);

  if (u_remap == 1.0) {
    vertexOffset = mix(vertexOffset, normalize(vertexOffset), u_normalize);
  }

  vec4 worldViewPosition = modelViewMatrix * vec4(position, 1.0);

  worldViewPosition += vec4(mix(vec3(0.0), vec3(vertexOffset, 1.0), u_effectBlend), 0.0);

  gl_Position = projectionMatrix * worldViewPosition;
}
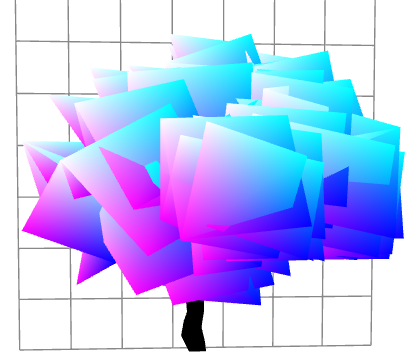
All this shader does is translate the vertices relative to the camera so that the quads on the mesh each have a pseudo-billboard effect, giving the tree its fluffy look.
There are built-in uniforms that 3JS uses that Babylon doesn't have. Here the 3JS-specific ones were modelViewMatrix and projectionMatrix.
projectionMatrix can just be replaced by projection. In 3JS, modelViewMatrix is viewMatrix * modelMatrix, so in Babylon we would replace modelViewMatrix with view * world (reminder that matrix multiplication is not commutative).
I then declared view, world, and projection at the top with the other uniforms, and when I created the ShaderMaterial in Babylon, I passed those uniforms in. I also had to explicitly add position and uv as attributes (per-vertex data).
Once I replaced those uniforms, the next issue I ran into was varying vec2 v_uvs. varying variables are used to pass data from vertex shaders to fragment shaders, but the blog post I was following didn't actually have a fragment shader explicitly defined. It appears they were using a package that provided it, so we'll come back to that variable later.
But at the end of the conversion, the vertex shader looked like this:
ShaderStore.ShadersStore['customVertexShader'] = `
attribute vec3 position;
attribute vec2 uv;

uniform mat4 world;
uniform mat4 view;
uniform float u_effectBlend;
uniform float u_remap;
uniform float u_normalize;
uniform mat4 projection;

varying vec2 v_uvs;

float inverseLerp(float v, float minValue, float maxValue) {
  return (v - minValue) / (maxValue - minValue);
}

float remap(float v, float inMin, float inMax, float outMin, float outMax) {
  float t = inverseLerp(v, inMin, inMax);
  return mix(outMin, outMax, t);
}

void main() {
  v_uvs = uv;

  vec2 vertexOffset = vec2(
    remap(uv.x, 0.0, 1.0, -u_remap, 1.0),
    remap(uv.y, 0.0, 1.0, -u_remap, 1.0)
  );

  vertexOffset *= vec2(-1.0, 1.0);

  if (u_remap == 1.0) {
    vertexOffset = mix(vertexOffset, normalize(vertexOffset), u_normalize);
  }

  vec4 worldViewPosition = view * world * vec4(position, 1.0);

  worldViewPosition += vec4(mix(vec3(0.0), vec3(vertexOffset, 1.0), u_effectBlend), 0.0);

  gl_Position = projection * worldViewPosition;
}
`;
Then after creating the ShaderMaterial, I passed in the uniform starting values:
shaderMaterial.setFloat('u_remap', 1.0);
shaderMaterial.setFloat('u_normalize', 1.0);
shaderMaterial.setFloat('u_effectBlend', 1.0);
This resulted in a shader that made the quads of the mesh face the camera, like this in the 3JS demo (just without the colors):
Creating the Fragment Shader
Next I needed to make it actually look like foliage, and for this, I had to make the fragment shader that was omitted from the 3JS demo. This is what I came up with:
ShaderStore.ShadersStore['customFragmentShader'] = `
	precision highp float;
	varying vec2 v_uvs;
	uniform sampler2D textureSampler;
	uniform vec3 u_color;

	void main(void) {
	    vec4 texColor = texture2D(textureSampler, vUV);

	    float luminance = dot(texColor.rgb, vec3(0.299, 0.587, 0.114));

	    gl_FragColor = vec4(u_color * texColor.rgb, luminance);

	    if (luminance < 0.75) {
	      discard;
	    }
	}`;
This was the texture I had from the demo:
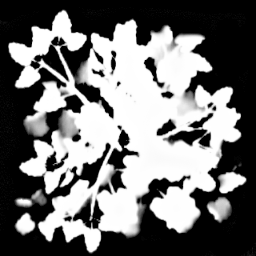
The fragment shader takes that texture, determines the "luminance" at coordinates v_uvs (from the vertex shader) and if it is sufficiently dark (black basically) it does not draw that fragment. This is essentially using a cookie cutter on the quads we saw earlier to turn them into leaf shapes.
It then multiplies it by the color you pass in to make the fragment that color.
The texture and color were passed into the shader from Babylon like this:
const alphaMap = new Texture('https://douges.dev/static/foliage_alpha3.png', scene, false, false, Texture.NEAREST_NEAREST);
alphaMap.hasAlpha = true;
shaderMaterial.alphaMode = Material.MATERIAL_ALPHABLEND;
shaderMaterial.setTexture('textureSampler', alphaMap);
const foliageColor = new Color3(63 / 255, 109 / 255, 33 / 255);
shaderMaterial.setColor3('u_color', foliageColor);
Enabling the Shader for Use with Instances
At this point I tried to create an instance of my tree mesh and discovered that my shaders as written didn't work. The foliage mesh was invisible.
It turns out there are some adjustments you have to make to your vertex shader in order for it to work with instances in Babylon. First, at the top of the GLSL code, you need to add #include<instancesDeclaration> and at the top of the main() function you need to add #include<instancesVertex>. You no longer have to pass in world (so you can delete it from the uniforms), and instead you will use finalWorld (provided by the include I believe).
Once that's done, you should be able to create an instance of the mesh that already has the ShaderMaterial applied and it should just work.
Lighting Effects
At this point the foliage was all one shade of green, and didn't have the nice shadows that were in the 3JS demo. I found an example of a toon shader in the CYOS tool, and incorporated that into my fragment shader, resulting in its final form:
precision highp float;

// Varying variables for lighting calculations
varying vec2 vUV;
varying vec3 vPositionW;
varying vec3 vNormalW;

// Uniforms
uniform sampler2D textureSampler;
uniform vec3 u_color;
uniform vec3 vLightPosition; // Add a light position uniform

void main(void) {

  // Toon shader thresholds and brightness levels
  float ToonThresholds[4];
  ToonThresholds[0] = 0.95;
  ToonThresholds[1] = 0.5;
  ToonThresholds[2] = 0.2;
  ToonThresholds[3] = 0.03;

  float ToonBrightnessLevels[5];
  ToonBrightnessLevels[0] = 1.0;
  ToonBrightnessLevels[1] = 0.8;
  ToonBrightnessLevels[2] = 0.6;
  ToonBrightnessLevels[3] = 0.35;
  ToonBrightnessLevels[4] = 0.2;

  // Light calculation
  vec3 lightVectorW = normalize(vPositionW - vLightPosition);
  float ndl = max(0., dot(vNormalW, lightVectorW));

  // Apply toon shading
  vec3 color = texture2D(textureSampler, vUV).rgb;
  for (int i = 0; i < 4; i++) {
	  if (ndl > ToonThresholds[i]) {
		  color *= ToonBrightnessLevels[i];
		  break;
	  }
  }

  // Original luminance and transparency logic
  float luminance = dot(color, vec3(0.299, 0.587, 0.114));
  if (luminance < 0.75) {
	  discard;
  }

  gl_FragColor = vec4(u_color * color, luminance);
}
The addition of new varying variables also required me to update my vertex shader by adding calculations for those variables. Here is the final version of the vertex shader:
attribute vec3 position;
attribute vec2 uv;
attribute vec3 normal;

#include<instancesDeclaration>
uniform mat4 view;
uniform float u_effectBlend;
uniform float u_remap;
uniform float u_normalize;
uniform mat4 projection;

varying vec2 vUV;
varying vec3 vPositionW;
varying vec3 vNormalW;

float inverseLerp(float v, float minValue, float maxValue) {
  return (v - minValue) / (maxValue - minValue);
}

float remap(float v, float inMin, float inMax, float outMin, float outMax) {
  float t = inverseLerp(v, inMin, inMax);
  return mix(outMin, outMax, t);
}

void main() {
  #include<instancesVertex>

  vec2 vertexOffset = vec2(
	remap(uv.x, 0.0, 1.0, -u_remap, 1.0),
	remap(uv.y, 0.0, 1.0, -u_remap, 1.0)
  );
  vertexOffset *= vec2(-1.0, 1.0);

  if (u_remap == 1.0) {
	vertexOffset = mix(vertexOffset, normalize(vertexOffset), u_normalize);
  }

  vec4 worldPosition = finalWorld * vec4(position, 1.0);
  vPositionW = worldPosition.xyz;

  vNormalW = normalize(vec3(finalWorld * vec4(normal, 0.0)));

  vec4 worldViewPosition = view * finalWorld * vec4(position, 1.0);
  worldViewPosition += vec4(mix(vec3(0.0), vec3(vertexOffset, 1.0), u_effectBlend), 0.0);

  vUV = uv;

  gl_Position = projection * worldViewPosition;
}
Applying those shaders to my mesh culminated in a beautiful tree:
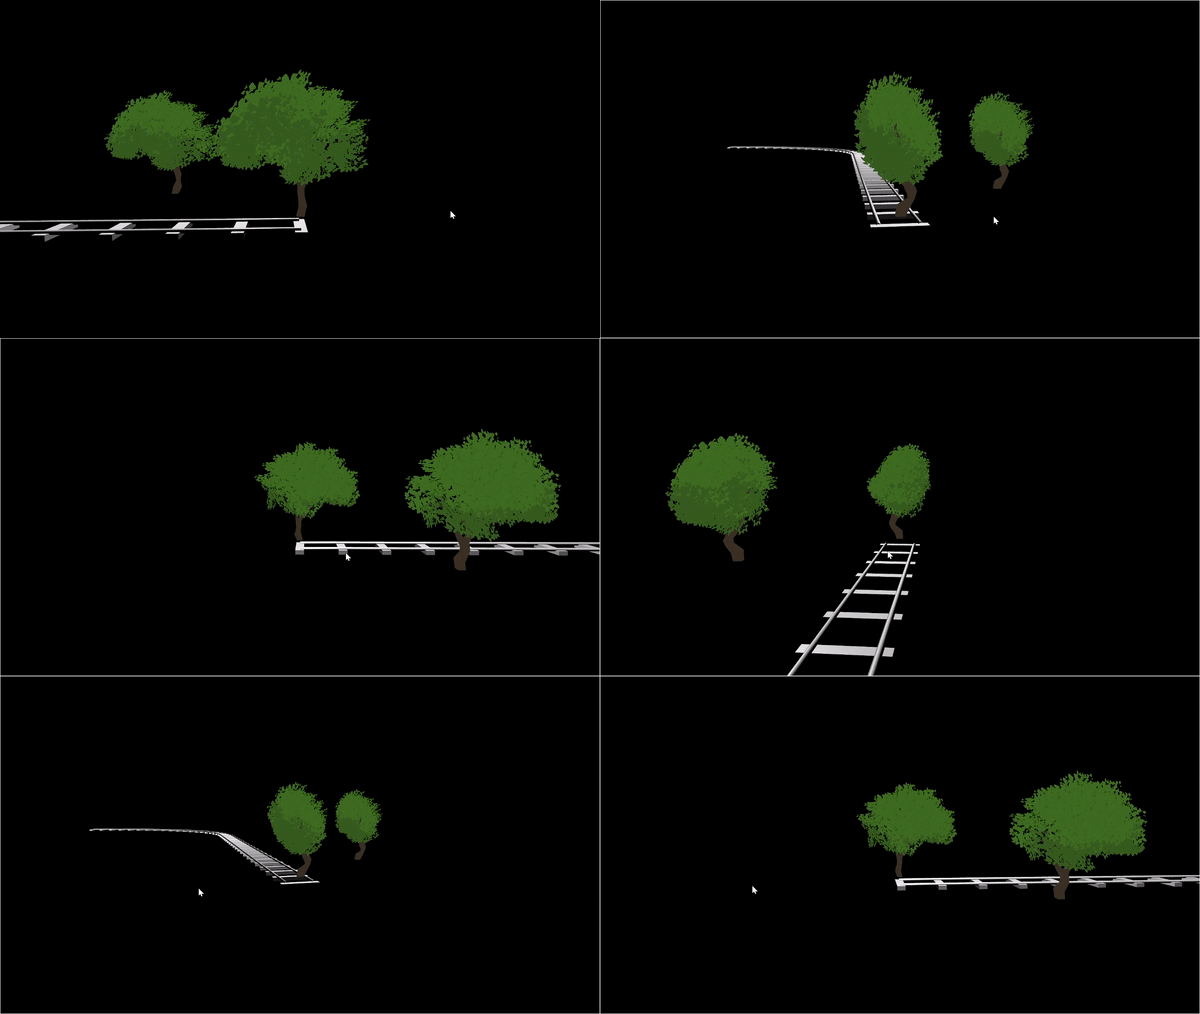
You can find a full, functional demo here.
I hope you find this tutorial helpful, and please feel free to reach out with any questions!
12.20.23
Thomas Burgess, *@thomasburgess.dev